The brackets are universal. If the drain of a flat roof is in the middle and there is no gutter, three mounting methods are available. In every case the probe lies at the roof drain, where water collects if there is a blockage.
Agree it with Allbase first. These flat-roof methods have not yet been documented on a live installation, so please agree the mounting details and cable routing with Allbase before fitting.
The steps referred to below are the numbered steps in Installing the gutter sensor on a roof gutter.
Method A: Clamp at the roof drain
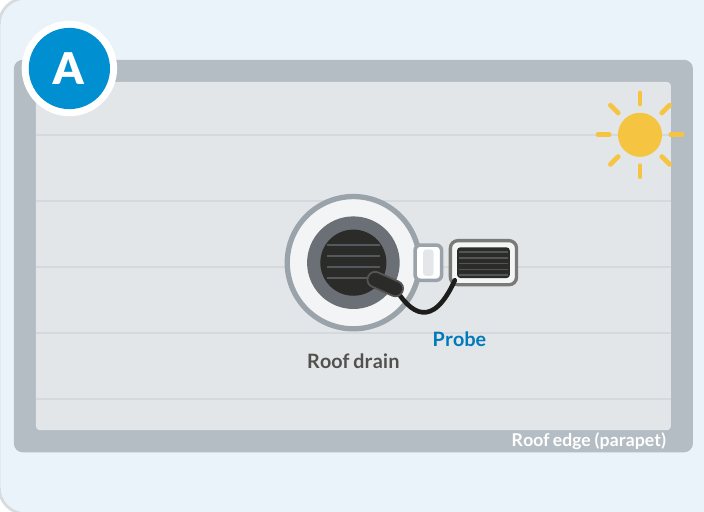
Suitable if the drain has a stable, vertical rim, for example a gully top, extension ring or leaf guard.
- Clear leaves and dirt from the drain rim and its surroundings.
- Place the clamp bracket on the rim, tighten the thumbscrews by hand and align the gateway (steps 2 to 4).
- Lay the probe at the drain inlet and route the cable with a loop (steps 5 and 6).
Note. Do not restrict the drain opening and do not damage the roof membrane or sealing collar. The rim must safely take the clamping force.
Method B: Clamp at the roof edge (parapet)
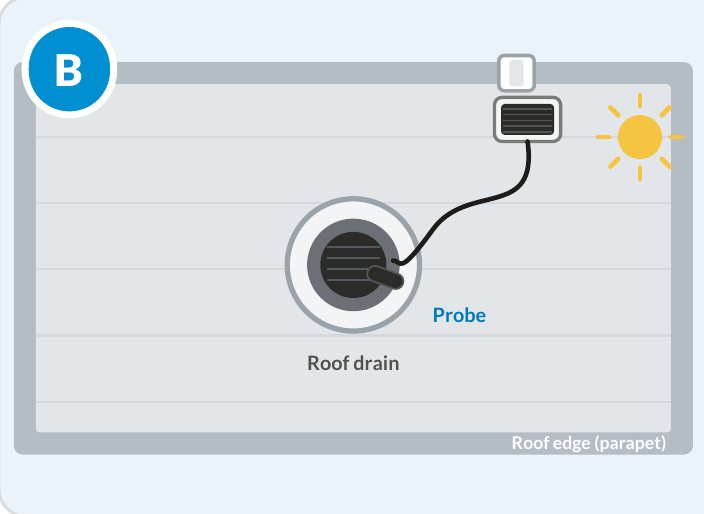
Suitable if the drain is not too far from the roof edge and the sensor cable reaches it.
- Clean the parapet or roof-edge upstand and check the clamping point.
- Tighten the clamp bracket on the roof edge, then align the gateway and panel.
- Route the cable flat and protected to the drain, lay the probe at the inlet and secure the cable against wind and tripping.
Note. Check the cable length and distance beforehand: no tension and no sharp edges. Fall protection applies at the roof edge.
Method C: Free-standing with ballast
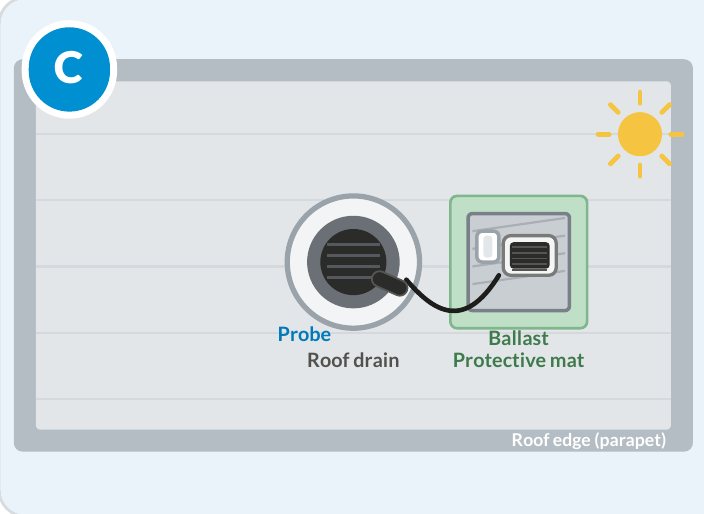
Suitable if clamping at the drain or the roof edge is not possible.
- Clean the base area and lay a protective layer, such as a building protection mat, on the membrane.
- Place a ballast body of sufficient weight, for example a concrete slab, fix the bracket to it firmly and align the gateway.
- Lay the probe at the drain, route the cable flat and secure it.
Note. Do not drill or glue. Have the weight and stability against wind suction and sliding determined by a competent person, and keep within the roof load.
For all flat-roof options
- Never penetrate the roof membrane. The bracket, cable and probe must not damage it.
- The drain must stay clear. The bracket, ballast and cable must not obstruct the water flow.
- Enter the flat roof only with approval and fall protection, and secure the edge areas.
- Align the solar panel to the light and watch for shading, snow and dirt.