The sensor is clamp-mounted on the front edge of the gutter, without drilling and without touching the structure. The thumbscrews are tightened by hand. On a standard gutter, fitting typically takes 10 to 15 minutes once you are at the gutter.
This guide covers fitting to a roof gutter, which is the standard installation. For a flat roof with a central drain see Fitting the gutter sensor on a flat roof, and agree those options with Allbase before you install.
Before you start
The sensor system
- Gateway with solar panel
- Swivel mount (ball joint with thumbscrew)
- Clamp bracket with two thumbscrews
- Sensor cable with probe, connected to the gateway
Bring along
- Safe access: ladder, scaffold or lifting platform
- Protective gloves, as gutter sheet metal has sharp edges
- Hand scoop or brush and a bucket for leaves and debris
- Smartphone or camera for documentation
- Access to the monitoring portal
Check the installation location
- The gutter has a stable, undamaged front edge for the clamp bracket: no loose or corroded sheet metal and no loose joint.
- The solar panel will receive as much daylight as possible. Avoid shading from trees, roof overhangs or parts of the building.
- There is mobile reception at the site. A normal phone signal at the gutter is a good first indication, and doubtful sites can be checked with a demo device.
- The probe can lie where water collects if there is a blockage, for example near the downpipe inlet, and the cable reaches it without tension.
- The gateway hangs freely on the outside of the gutter and does not touch the facade, a window or the roof.
- The owner's or operator's approval is in place.
Safety
Working at height. Please do not use the gutter as a step or standing surface, and secure the ladder against slipping. Avoid installing in wet, frosty, stormy or thundery conditions. At greater heights use scaffolding or a lifting platform and the fall protection the site operator specifies.
Edges, cable and panel. Gutter sheet metal has sharp edges, so wear protective gloves. Do not kink, crush or pull the cable over sharp edges. Keep the solar panel and the rainfall reference clear: nothing should cover, stick to or damage them.
Step 1: Prepare the gutter
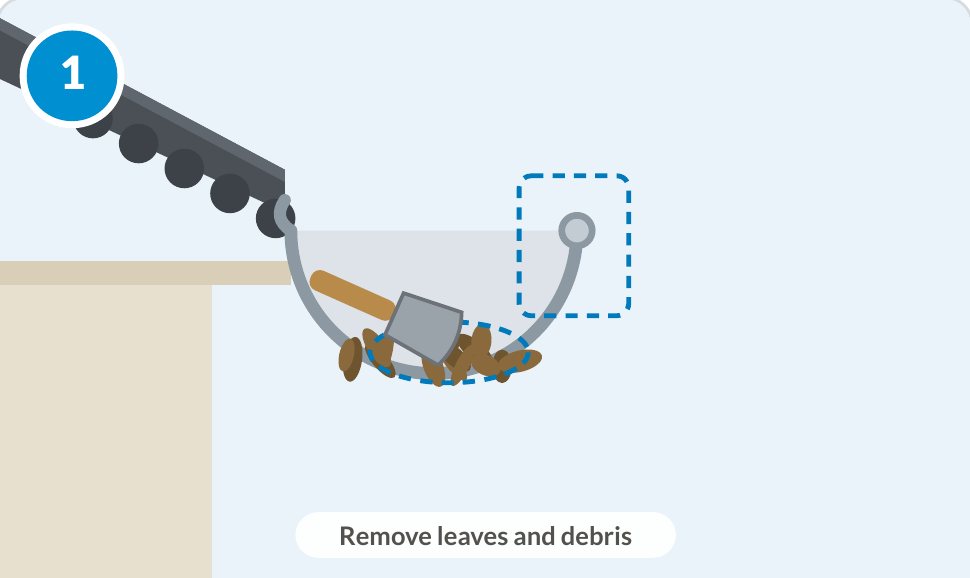
Remove leaves, dirt and deposits at the clamping point and where the probe will lie. Check the front edge of the gutter for damage.
Check: clamping point clean, gutter bottom clear.
Step 2: Place the clamp bracket
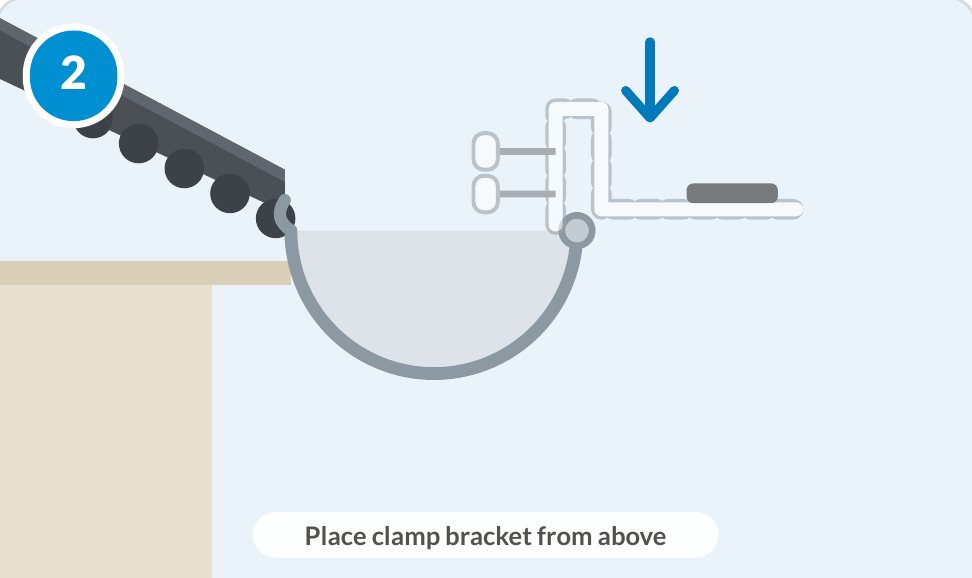
Loosen both thumbscrews far enough for the clamp bracket to fit over the front edge of the gutter. Place the U-profile on the front edge from above until it is fully seated.
Check: the thumbscrews point into the gutter.
Step 3: Tighten the thumbscrews
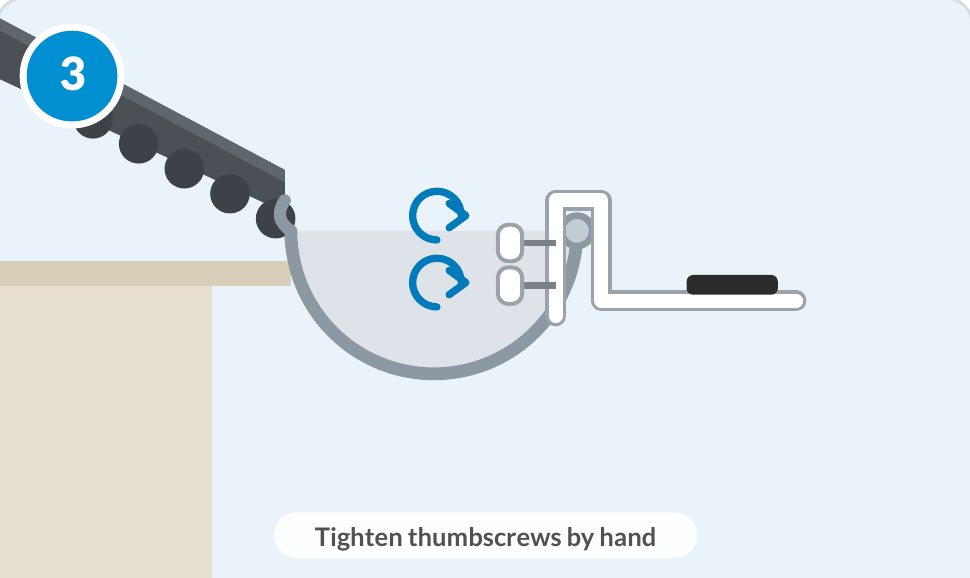
Tighten both thumbscrews evenly by hand until the clamp bracket sits firmly and can no longer be shifted or turned. Do not overtighten; the gutter metal must not deform.
Step 4: Align the solar panel
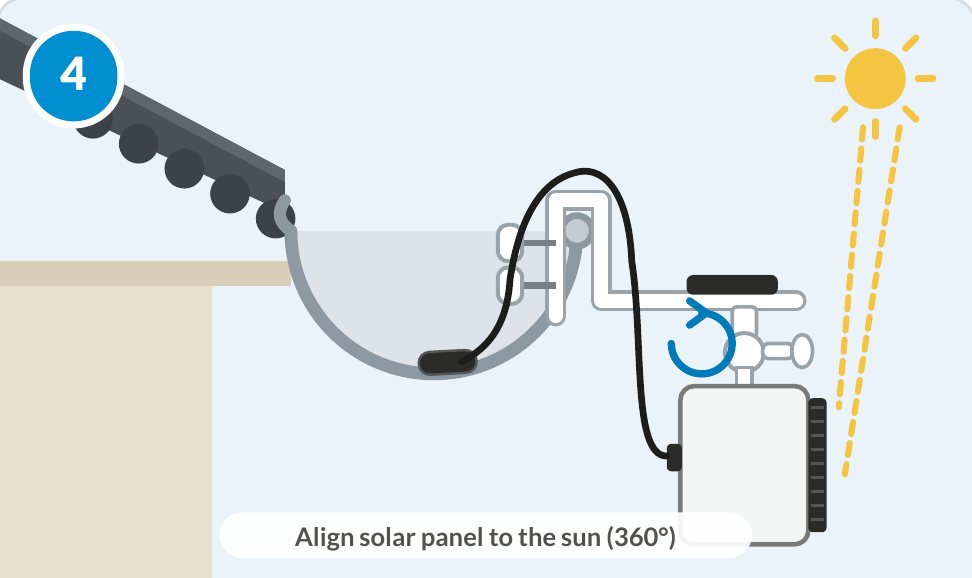
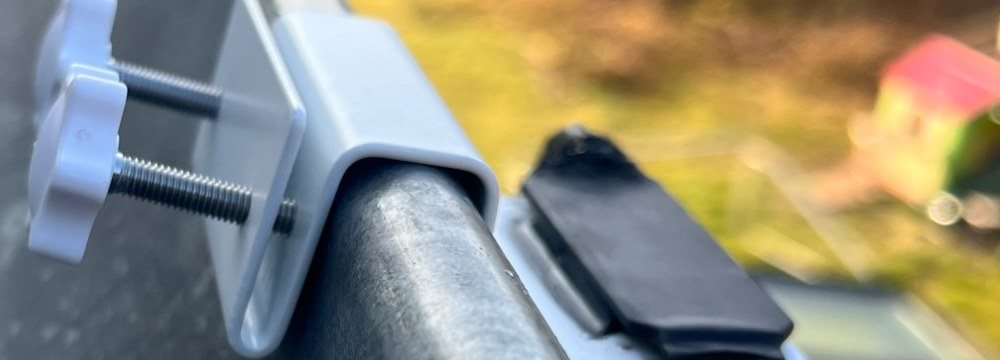
Loosen the thumbscrew on the joint, turn the gateway so that the solar panel faces the light (adjustable through 360 degrees) and tighten the thumbscrew again.
Check: the gateway hangs freely on the outside of the gutter.
Tip. The sun moves. Align the panel so that it receives light for as much of the day as possible and does not sit in the shade of roof overhangs, trees or neighbouring buildings. The panel charges from ordinary daylight, not only direct sun.
Step 5: Route the cable
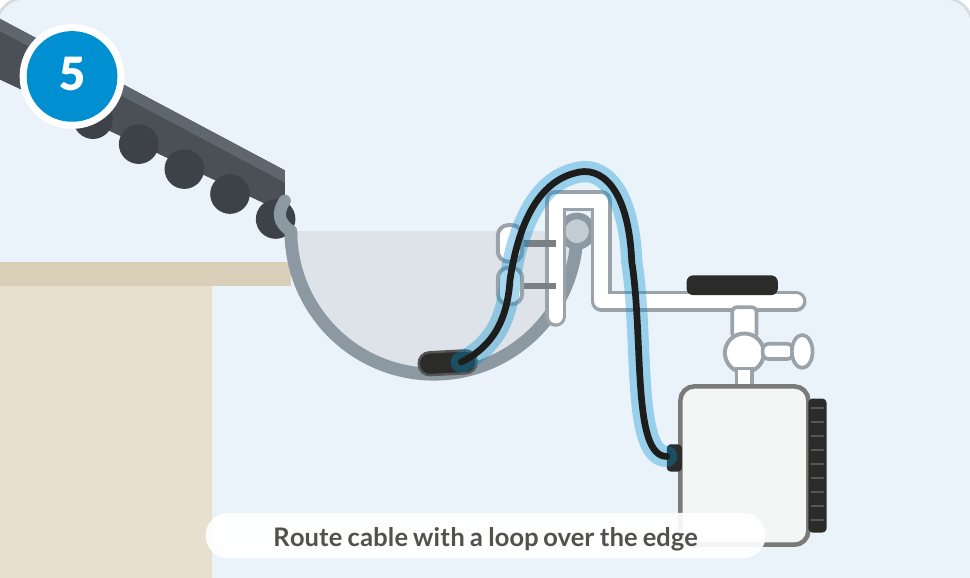
Route the sensor cable over the front edge of the gutter into the gutter. Lay it with a loose loop: no tension, no sharp kinks and not pulled over sharp sheet-metal edges.
Step 6: Place the probe
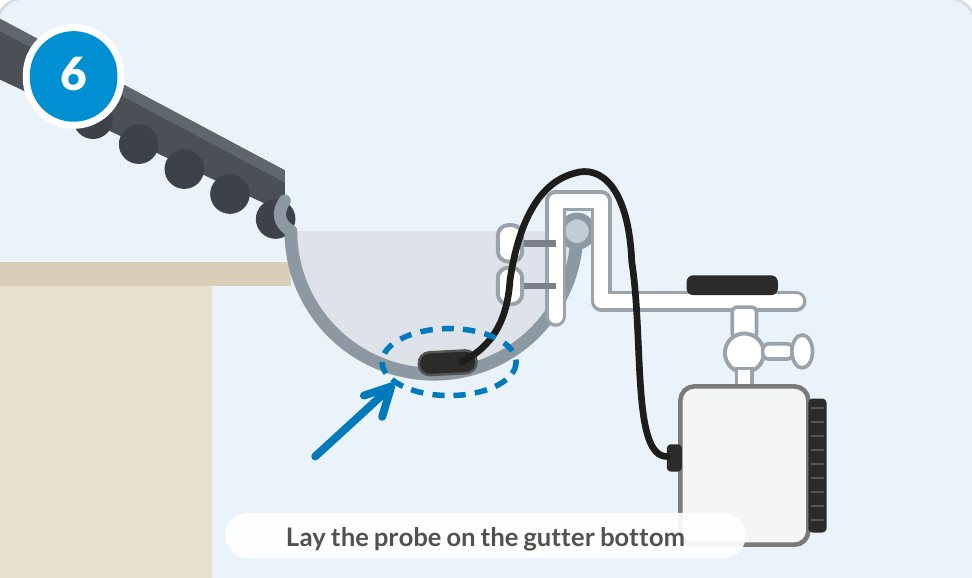
Lay the probe on the gutter bottom at the intended spot, where water collects if there is a blockage, for example near the downpipe inlet. It must not obstruct the water flow.
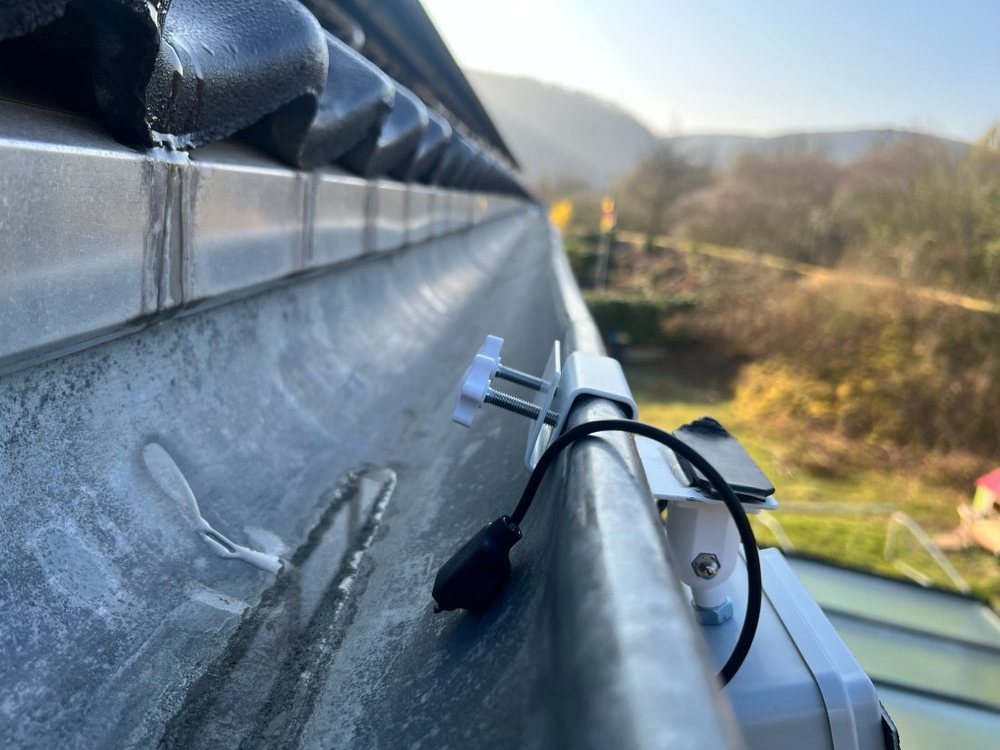
Step 7: Check and document
Check the seating of the clamp bracket and joint, the cable routing and that the rainfall reference is uncovered. Check the first readings in the monitoring portal. Record a photo, the device ID and the position in the installation record, which is on the last page of the installation guide.
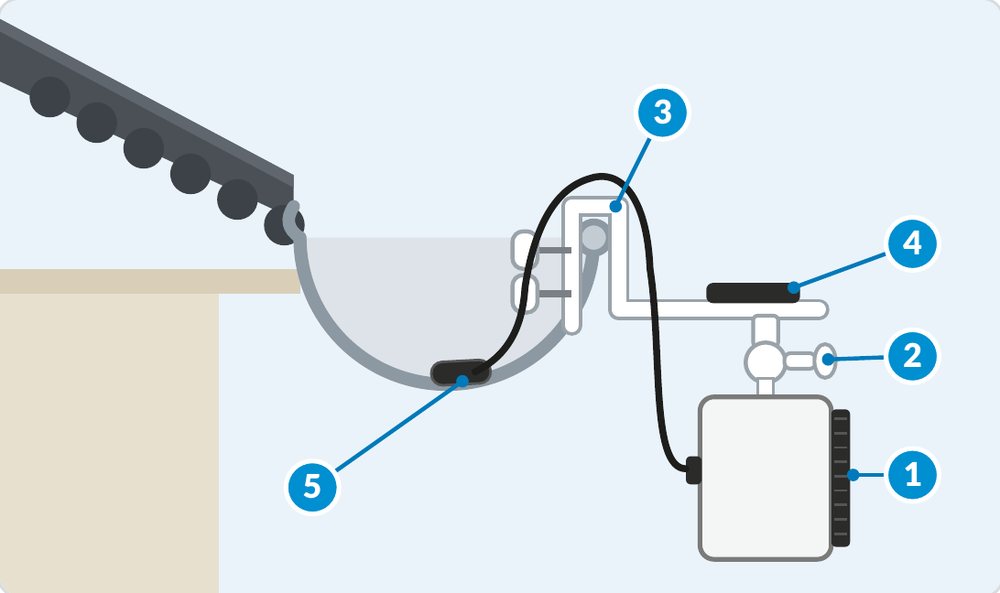
Important. The cable and probe must not obstruct the water flow and must not protrude into the downpipe. The solar panel and the black rainfall reference on the bracket need to stay free, clean and uncovered.
If no readings arrive
If nothing appears in the monitoring portal after installation, first check the alignment of the solar panel, the seating of the clamp bracket and the cable routing. If readings still do not arrive, contact Allbase and the unit can be diagnosed remotely. There is a short checklist in Gutter sensor not sending readings.
Downloads and related guides
- Installation guide (PDF), including the installation record
- How the gutter sensor works
- Gutter sensor: operation, maintenance and removal
- Gutter sensor product page